BATHROOM RENOVATION TIPS

9F1810FA-88F3-44E5-8D2D-7EB1D0845BBC.PNG

BATHROOM FITTINGS & ACCESSORIES

TIP - BATHROOM FITTINGS AND ACCESSORIES

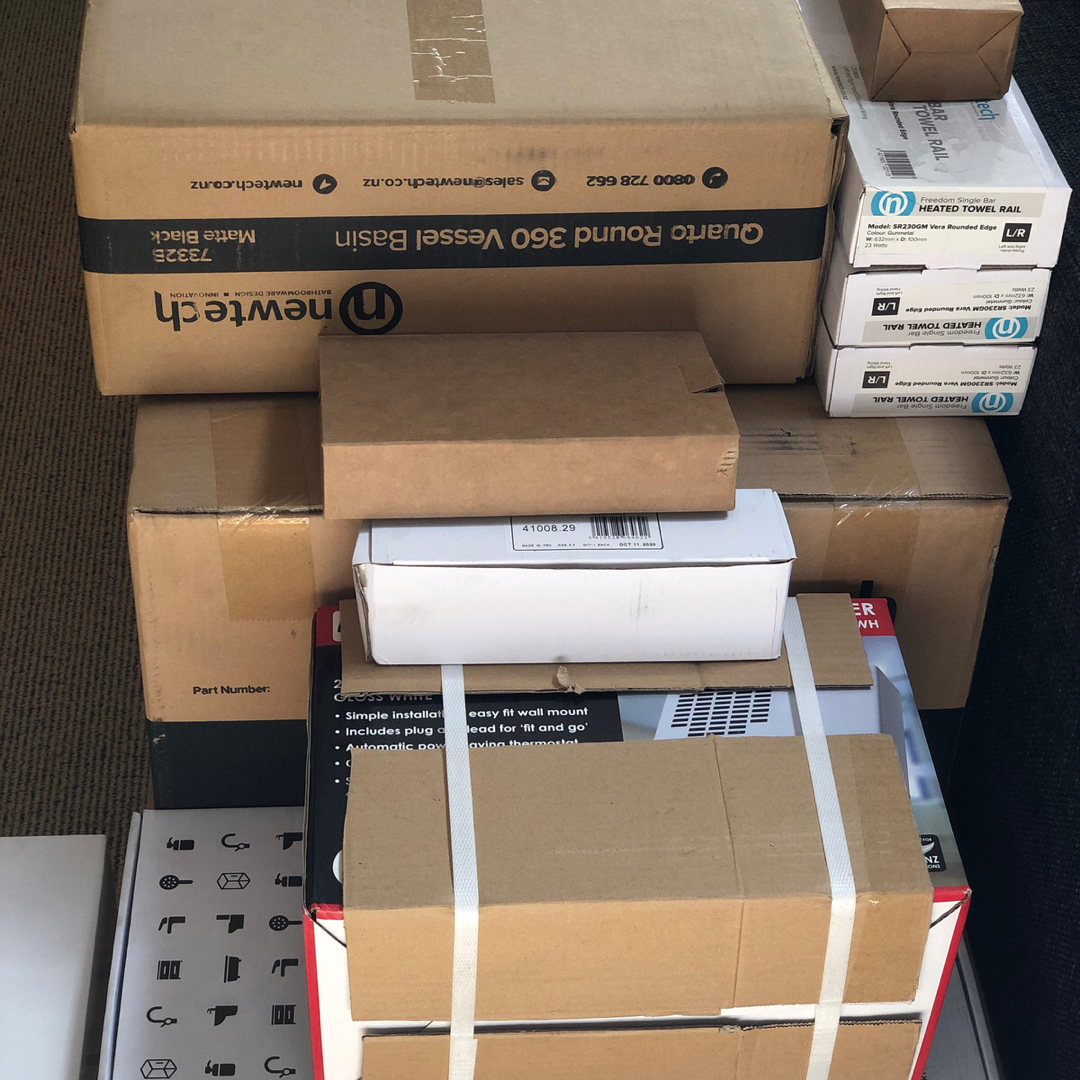
  • Check availability of bathroom fittings, accessories and tiles with suppliers so you allow enough lead-in time to suit your programme

  • Have all fittings at your home before you start the demolition to avoid delays to the programme or worse still incorrect pre-plumbing and pre-wiring placement.

2FAEEF5E-B6BC-49BF-B0D8-2C224C41E649.PNG

AFTER DEMOLITION AND BEFORE LINING WALLS

TIP - AFTER DEMOLITION BUT BEFORE WALLS ARE LINED

  • Confirm exact height of all your fittings. The vanity height will vary depending on whether you have a counter top basin or recessed basin.

  • Install “timber noggings” to provide in wall support for vanity, heated towel rail, shower head, towel rails and all other fittings so that they won’t move. Surprisingly this is often over looked!

  • Cut into wall framing to create shower and bath niches. These are a great way to maximise space and provide a shelf for bottles and soap.

94F40160-BC8D-4627-AC9A-026AB06BF5B7.PNG

SELECTING TILES

TIP - SELECTING TILES

  • Select tiles that are suitable for purpose, whether that be floor or wall. Polished, matt, non-slip …

  • Ceramic tiles are suitable for walls but not floors as they are not strong enough to walk on. They are glazed one side which makes them easy to clean and come gloss or matt finish.

  • Porcelain tiles are suitable for walls and floors. They are glazed one side very durable and easy to clean.

  • Natural stone tiles can be used for walls or floors. As stone is porous it isn’t as maintenance free as porcelain tiles. They will require more maintenance especially if they have a honed finish. This usually involves sealing them every couple of years.

54C3F1CA-C06C-44E3-BCF0-D05DA6403D65.PNG

WATER PROOFING

TIP - WATERPROOFING

  • The waterproofing is normally applied by your tiler. If not it would be done by an approved waterproofing applicator.

  • Check if they are using a council pre-approved waterproofing system as this is important for your Producer Statement.

  • Check that the correct linings have been used for different wet areas.

  • Compressed sheet to be used around baths, showers and over timber floors.

  • All other walls plus ceiling - use Aqua-line Gib board.

  • Get all sign-offs required for waterproofing including a Producer Statement from the applicator.

572ACA53-4B5C-4C3F-9186-6367D1FA6AE5.PNG

LAYING TILES

TIP - LAYING TILES

  • Discuss tile layout with tiler. there are many options including herringbone, stacked or staggered depending on the look you want.

  • Start tiling from the centre of the wall and then any cut tiles will be the same length either end and this looks balanced.

  • Start with a cut tile to top of wall then any cut tile at bottom of wall will be less noticeable to the eye.

  • Discuss options for corner joins where unglazed tile edges are exposed. Select the colour of corner trims with the tiler or alternatively discuss the option of mitred edges to avoid an unglazed edge situation.

  • Discuss and select grout and silicone colour with tiler, don’t leave to chance!

  • Request epoxy grout in areas where there is a lot of water eg showers, around baths and kitchen splash-backs.

KITCHEN FINISHES

CAREFUL PLANNING IS KEY TO ANY SUCCESSFUL KITCHEN PROJECT AND SELECTING YOUR FINISHES RELATES TO THE LOOK YOU ARE TRYING TO ACHIEVE, PRACTICALITY AND BUDGET.

fullsizeoutput_5f34.jpeg

PLANNING YOUR KITCHEN RENOVATION

#1 - PLANNING AND PREPARATION

  • Thorough planning and preparation is the key, this saves money, minuses stress and errors.

  • Determine a budget that include Kitchen cabinetry, appliances and installation.

  • Remember the cabinetry and appliances are not the only items to include in your budget. There is demolition, electrical, plumbing and sometimes gas work.Then there is the splash back and touch up painting at the very least. There may be other building work if you are relocating the kitchen.

  • Your budget is going to determine the selection of materials you use on benches and cabinetry. It will also determine the quality of the kitchen hardware such as drawer runners.

  • Start a Pinterest board and collect images of kitchens you like to discuss with your kitchen designer.

  • If you are on a very tight budget a flat pack kitchen is an option. However custom-made gives you more flexibility in layout and style.

  • A new kitchen is a sizeable cost so doing your research on finishes, appliances and design is invaluable as you want your kitchen to last at least 15 years.

fullsizeoutput_5f38.jpeg

CUPBOARD & DRAWER FINISHES

#2 CUPBOARD AND DRAWER FINISHES

  • MELAMINE- The most economical cupboard/drawer finish with a taped edge available in an extensive range of colours. It is very durable and low maintenance. However with a taped edge the join can be visible.

  • LASER EDGED MELAMINE - A step up from a taped edge as the laser edge makes the join seamless and it is not obvious to see the join line. This is my go to with most kitchens projects as it looks good and is an affordable option.

  • WOODGRAIN MELAMINE - The timber look melamine finishes are very realistic as they look and feel like timber as a result of recent technology. They are a very affordable option for a timber look.

  • LACQUER - This finish isn’t as hardwearing as melamine. However it has a very extensive colour range as it can be matched to a paint colour.

  • ACRYLIC - This is a step up from melamine and gives a similar look to lacquer but is chip and scratch resistant. This material can be selected in a matt or gloss finish. my preference is a matt finish.

  • VINYL - The vinyl is heated and pressed on flat or moulded fronts. it is very durable.However the options of profiled fronts is restricted.

  • SOFT MATT LAMINATE FINISH - This is a high pressure laminate with a soft Matt finish. It is ideal for handleless fronts and also for dark colours as it shows finger marks less than most finishes.

  • Timber Veneer - This is a thin sliver of timber glued to a MDF board. The grain can vary depending if it is quarter or crown cut. It can be stained to suit your preference but also comes refinished.

  • SOLID TIMBER - As the name implies this is solid timber which would make it a more costly option but it can be remanded and repolyurethaned.

fullsizeoutput_5f36.jpeg

BENCHTOPS

#3 - BENCHTOPS

  • HPL - High Pressure Laminates, is the most affordable option and comes in a vast range of colours. previously the edge detail compromised the look as there was a black edge line. Be aware of this when you select your colour as you want a colour that has a matching ABS edge tape so that the edge looks seamless.This is also a more durable edge, so this would always be my preference using a Laminate. You can also curve a laminate edge to a 8mm radius if you don’t want an edge tape. HPL is a great option when you are working to a tight budget as there is a very good colour selection including timber and stone look alikes.

  • AR TOUCH - This product from Laminex is a matt soft touch high pressure laminate that marks less, so particularly appropriate for dark colours which show marks more. The colours have a matching ABS tape for a seamless edge detail. I have used this in black and it looks great as it marks less which is particularly important if you are using push to open drawer fronts with no handles.

  • SOLID SURFACE ACRYLICS - This is made from a hard wearing acrylic and is non porous and stain resistant. You also have the option of using acrylic sinks in a matching colour, they can be moulded into the bench for a seamless look.This material is also UV resistant and can be used inside or outside, so perfect for an outside kitchen.

  • ENGINEERED STONE - QUARTZ Quartz benches are fabricated from crushed quartz and resin. This results in a very strong material. As it is non porous the bench tops don’t need to be sealed and they are stain resistant. This material is extremely popular because of the extensive colour range. Depending on the supplier it comes in 20mm and 30mm slabs but can be mitred to any thickness.I often use 20mm which is cost effective and looks great.

  • PORCELAIN - Made from natural recycled crushed stone, porcelain is created during a process involving intense heat and pressure that bonds the elements to create an extremely strong, thin, UV resistant, scratch and heat proof bench top. In fact you can take dishes out of the oven and put straight on the bench.It can be used inside or outside so perfect for outdoor kitchens and BBQ areas. One thing to be aware of is that the colour doesn’t always go through the slab, depending on how it is made. However the edge can be mitred to avoid seeing a different colour on the edge.

  • GRANITE - A natural stone where every slab is unique. It can be polished for a more durable finish or honed for a matt finish. It is not as stain resistant , non porous or scratch proof as Quartz. However with care it ages well and you are getting a natural unprocessed material. Cosentino has recently launched a range of granite that has a protective coating making it less porous and more stain resistant.

fullsizeoutput_5f39.jpeg

KITCHEN HANDLES & ACCESSORIES

#4 - HANDLES & ACCESSORIES

  • HANDLELESS - Cabinetry without handles has become very popular, this gives a very streamlined look, although does add additional to the cost but is worth the extra if you want a flush uncluttered look.There is also the option of using an electric mechanism so that you can tap the draw or cupboard and it will open fully. This is a great option for bin drawers and overhead cupboards.The electric option is more expensive but worth considering for areas that may be harder to reach or where you don’t want to use your hands.

  • There is a huge range of handles available . This includes aluminium extrusions fixed to the top of drawer or cupboard creating a recess for your fingers to pull it open. This is a good option if you want to have a flush look without going handleless. Then there is a wide range of handles fixed to the front and top of cabinetry, in a variety of finishes. Handles are a good way of adding detail to your kitchen especially for more classic kitchens.They add colour detail and contrast.

  • ACCESSORIES - Whether you want knife blocks, spice holders, film and foil dispensers, plate holders, bottle drawers … There are many options available that maximise your storage.

AVOID BATHROOM RENOVATION DISASTERS

SELECTING & WORKING WITH YOUR BUILDER

fullsizeoutput_5857.jpeg

#1 - CHOOSE YOUR BUILDER CAREFULLY

  • Check that the builder you are considering is a LBP (Licensed Building Practitioner)

  • Before you decide who to use ask for references & look at similar projects that they have built. This is essential even if it is a friend or they have come recommended.

  • Ask the owner about the builder’s communication, co-ordination of subcontractors, quality of work and were they kept updated on progress & any items affecting cost.

  • Make sure the builder specialises in similar work to your project. Renovations are different to new builds and have different challenges.

  • Check who will be working on your project as it is not necessarily the person pricing the job especially for larger companies as they have someone pricing who isn’t on the tools.

  • Problem solving and good communication are key as this saves money and time when unforeseen issues arise. Therefore getting the right builder is critical.

IMG_1343.JPG

#2 - GET A FIXED PRICE QUOTE

  • A fixed price quote is preferable for building work as it gives you a fixed price based on the work shown on your drawings, but always allow a contingency sum no less than 10%of the quoted price to allow for unforeseen items.

  • This is especially important for renovations, where you can’t see the existing structure and services until demolition has happened and you are often in for a surprise as there can be rotten framing or services needing upgrading.

  • Check how often the contractor invoices so you can plan your cashflow and arrange any bank loans. Invoicing can be weekly, fortnightly or monthly, depending on the size of the job and what you agree with the contractor.

  • Ask the contractor to confirm their hourly rates for the building work and also for subcontractors so there are no surprises for how variation are charged.

  • Clarify and agree the margin the builder will charge to co-ordinate the subcontractors. This can vary from 10-15%

  • I would only recommend working with a builder on a charge up basis if you have complete faith in the builder. If you do this ask for a detailed estimate on the following - demolition, building work, plumbing, electrical, waterproofing, tiling and any other subcontractors necessary to do the work.

IMG_1344.JPG

#3 - GET A PROGRAMME FOR THE WORK

  • Builders can often be reluctant to put a programme in writing, my advice is to insist on this before work starts. This is a key component of the job running smoothly. The programme should be updated as work progresses to reflect any delays or additional work.

  • You need to know the sequence of events and when the different sub trades will be needed on site.This makes it easier for you to plan and minimise the inconvenience especially if you have to move out. Aspects of the work could affect your access, demolition taking away materials or when materials or fittings are delivered. If you are on a shared driveway it also impacts on your neighbours.

  • Having a programme will identify when you need to provide fittings that you are supplying , bathroom fittings, lighting and tiling are commonly client supplied items.If they aren’t on site when needed this can delay programme. Bear in mid there is often a lead-in time on fittings, tiles and lighting so order well in advance.

  • Builders often avoid putting a programme on paper but it is very valuable for them too as it highlights critical areas of the project that may hold the job up so it means they can anticipate and plan ahead for these potential hold ups.This is important for the overall project as delays add time and cost.

IMG_1346.JPG

#4 - HAVE BATHROOM AND ELECTRICAL FITTINGS ON SITE BEFORE STARTING

  • The plumber rand electrician need to see your plumbing and electrical fittings as soon as demolition is completed and before they start pre-plumbing & pre-wiring. This is critical to get the correct heights and placement of fittings, ensure water inlets and outlets are in the correct position eg toilet cistern water supply.Cisterns are all different with inlets in varying positions and once the walls are lined it is too late to make changes.

  • Check availability of all fittings well in advance as lead-in times vary even if fittings are off the shelf. This applies to vanities where the lead-in might be 3-6 weeks.

  • The builder needs to see fittings so that they can put extra support in the walls for them. A vanity may be wall or floor mounted and requires fixing in the correct position.This also relates to towel rails, toilet roll holders and other accessories, if you don’t they will be wobble.This often gets overlooked so check with your builder before the walls are lined.

  • Don’t let the cabinetmaker drill any holes in the vanity top without seeing the tap. The length of the tap spout will determine where it is situated.

IMG_1345.JPG

#5 - END OF PROJECT - REMEDIAL WORK COMPLETED & SIGN OFFS

  • Once your bathroom project is finished, thoroughly check everything has been completed correctly and make a list of any remedial items.Get these done before you pay the final invoice.

  • Look into whether a Building Consent is required. If you are increasing the number of plumbing fittings, moving load bearing walls or tiling you would need a Building Consent for any of these items.

  • If a Building Consent was required make sure your builder obtains a Code of Compliance for the work. He will need to apply for this.Keep a copy for your records.

  • Ask your builder for a list of all subcontractors who worked on the project so that you have their contact details for any maintenance work in the future.

  • Get written warranties on workmanship and Producer Statements from all subcontractors

  • Ask suppliers for maintenance instructions on cleaning any special surfaces. The suppliers may recommend special cleaning products.